- Download and install the Samsung USB driver on your computer.
- Download and extract the file Odin Downloader
- Download file TWRP Samsung Galaxy J7
- Download file SuperSU.zip
- Once you have downloaded all the files above, now turn off your Smartphone
- After turning off, you need to boot into Download Mode, to boot into Download Mode press and hold the "Volume Down + Home + Power" together to Download Mode is active.
- In the Download Mode you will see a yellow triangle warning signs, in this situation you have to press the Volume Up key to continue.
- Now, open the file that you have downloaded Odin3_v3.10.6.sfx.exe.
- Then connect your smartphone to a computer via USB cable
- After you connect the smartphone to a computer, Odin will automatically recognize device and message "Added"
- Once the device is detected by Odin, click on the button "AP" and select the file twrp-2.8.7.0-j7elte.img.tar
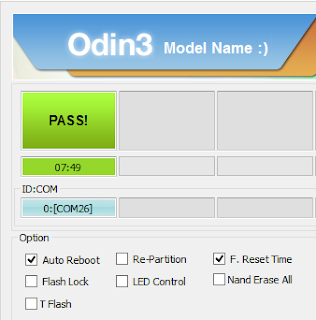
- Now, click on the "Start" button in Odin to start Flahing, Flashing usually takes 30-50 seconds to complete the process of flashing the Samsung Galaxy J7. Once the flashing process in completed you will be able to see a green box with the words "Pass" in Odin. During this process the Smartphone will automatically re-boot
Rooting Samsung Galaxy J7
- When finished installing TWRP on Samsung Galaxy J7, now is the stage of rooting the Samsung Galaxy J7
- Move file SuperSU.zip to the internal storage your smartphone
- Then turn off your Samsung Galaxy J7
- Then go into Recovery Mode by pressing and holding down the "Volume Up + Home + Power" simultaneously until the TWRP Recovery mode
- Now select "Install" and then scroll down until you see the file "SuperSU.zip"
- After the flashing is complete, you will see the option "Reboot System", click to reboot your device.
- Now to make sure you have succeeded in Root Samsung Galaxy J7, open the application menu on your Smartphone and you will find SuperSU application, if the application is on your smartphone, then it means you have succeeded in your Smartphone device Root


No comments:
Post a Comment